How to Resolve: Violation of Usage of Android Advertising ID policy Issue

Issue: Violation of Usage of Android Advertising ID policy and section 4.8 of the Developer Distribution Agreement

Google Play requires developers to provide a valid privacy policy when the app requests or handles sensitive user or device information. We’ve identified that your app collects and transmits the Android advertising identifier, which is subject to a privacy policy requirement. If your app collects the Android advertising ID, you must provide a valid privacy policy in both the designated field in the Play Console, and from within the app.

Even if you don’t use Advertising ID yourself and just use admob libraries, these libraries use this Advertising ID internally to show targeted Ads to your users.

If your app is removed for this reason, you can add a privacy policy to your play store listing, you can use this link to generate privacy policy: https://app-privacy-policy-generator.firebaseapp.com/ (please do consult your legal consultant as well).

You can follow these steps to generate the privacy policy

  1. open the link https://app-privacy-policy-generator.firebaseapp.com/
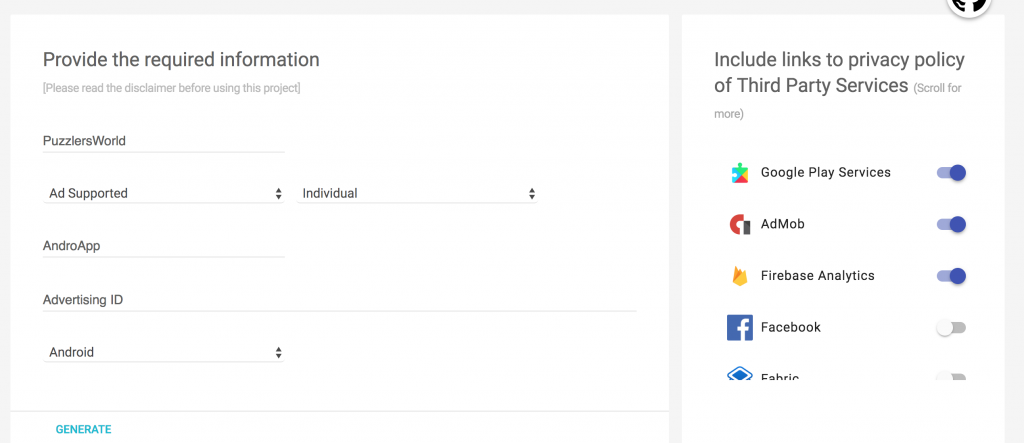
  2. Enter details as below, replace PuzzlersWorld with your App Name
  3. Select Admob and Firebase Analytics on the right
  4. Click on Generate button
  5. Copy the text and create a page in your website

Update Privacy Policy link to Play store account

  1. Once you have your privacy policy link
  2. Login to google play developer console: https://play.google.com/apps/publish/
  3. Select the App with issue
  4. Go to Store Presence -> Store listing and scroll to the bottom
  5. uncheck not submitting privacy policy at current time and enter your privacy policy link 
  6. And click on Resubmit App button
  7. Please wait for 48 hours for Google to process the update


Related Post

Toubleshoot: Push Notifications Are not Working

This is the trouble shoot doc for debugging on push notifications are not working on AndroApp via AndroApp wordpress plugin.

Go here, If your push notification are working for Android app and not working only for IOS app.

  1. If you are using v0 of push notifications
    1. Did you enter the correct Google/Firebase API Keys(associated with the project number) and entered in WordPress dashboard? double check step 13 here https://androapp.mobi/blog/setup-firebase-cloud-messaging/182
  2. If you are using v1 of push notifications
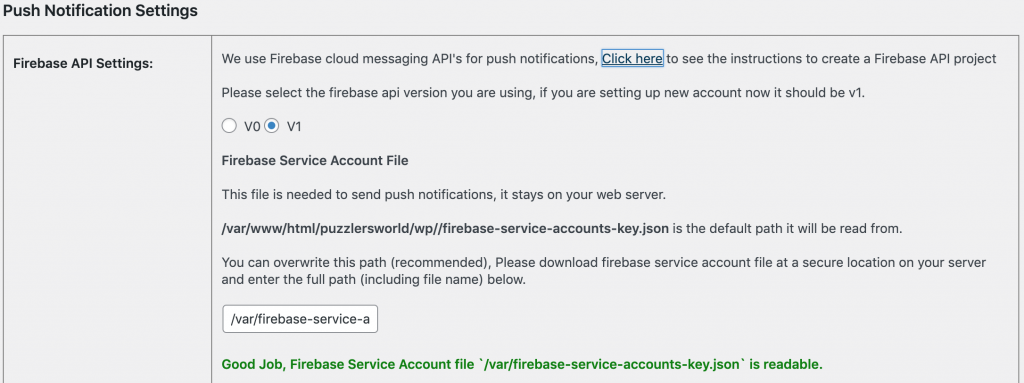
    1. Did you download the firebase service account file to your web server and updated the path in the textbox on Account Settings tab?
    2. It should show the green message confirming we are able to read the file.
  3. Did you enter Firebase App ID? ex. 1:447538456741:android:2efde8542de19a66
  4. Did you enter the correct package name while creating your firebase project (step 6 ), please enter the package name you see in the email from us, ex. package name: mobi.androapp.bwerbvo.c9601
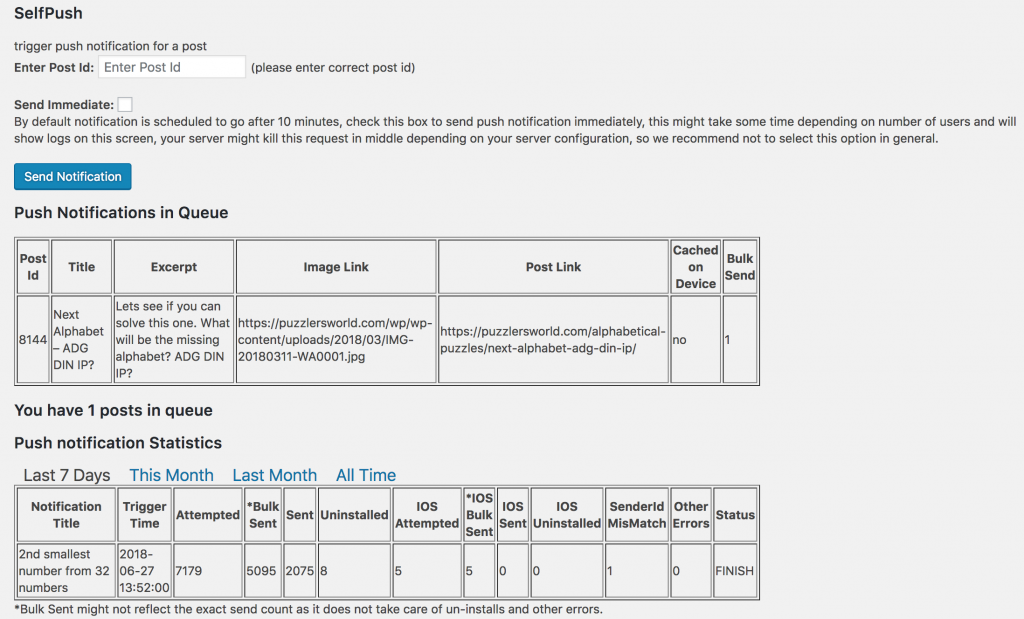
  5. Did you try SelfPush feature from AndroApp->Push Notifications tab? Try by checking Send Immediate checkbox and share the logs with us.
  6. Did you try sending push notification by enabling/disabling Bulk Send feature?
  7. Did you wait for 30 minutes after installing the app?
  8. Did you check the status table in AndroApp->Push notifications tab? there are 2 tables Push Notifications in Queue & Push Notifications Statistics, if you don’t select Send Immediate checkbox (Also when you publish a new post), you should see your notifications in Push Notifications in Queue table. Which are tried after 15 minutes when your cron runs.
  9. If you see UnAuthorized in the Send Immediate logs, double check your Google API Keys, it is wrong.
  10. Do you see this in the Androapp->Push Notifications tab?


We will suggest to try all above and if you still have issues in sending push notifications, please drop us an email with following details

  1. Your website link & apk link which you tested
  2. google-services.json file
  3. Full Screenshot of AndroApp->Account Settings tab
  4. Logs for the trial of Send Immediate
  5. Screenshot of both push notification table (it should have both entries with/without Bulk Send enabled)
  6. Does it work when using Send Immediate but not if you don’t select or it does not work in both the cases?

Related Post

How to Test your app using TestFlight

  1. Login to appstoreconnect.apple.com
  2. Go to MyApps and select the app you want to test
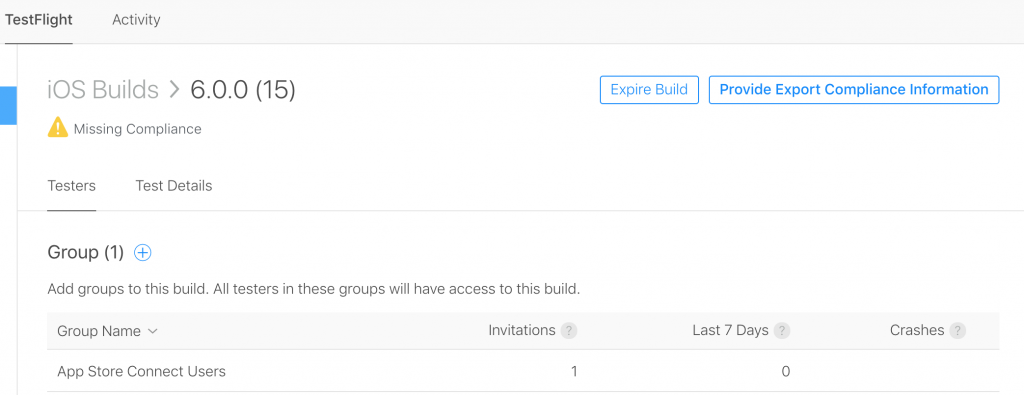
  3. Select TestFlight tab and select your build you uploaded
  4. IF you see yellow icon with missing compliance, click on the build
  5. Now click on Provide Export Compliance Information button
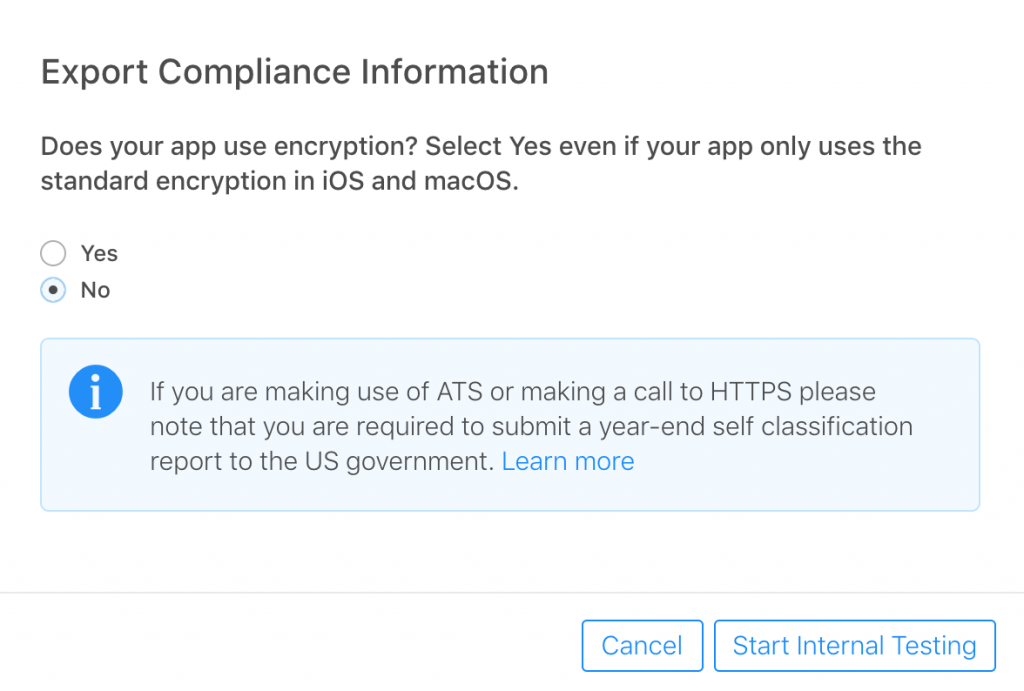
  6. Select No, in Export Compliance Information (your app does use HTTPS though, to make call to https://androapp.mobi but does not use any IOS, macOS encryption)
  7. Click on Add Testers to build OR create a new group was clicking on + icon
  8. Provide information of tester like email, firstname and lastname
  9. Enter your details, email, contact information and click on Next
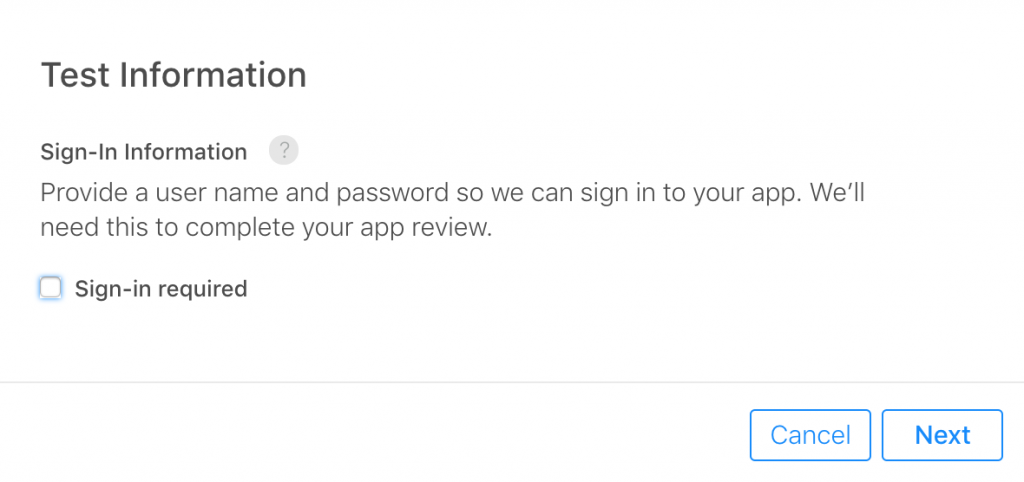
  10. uncheck the sign in required
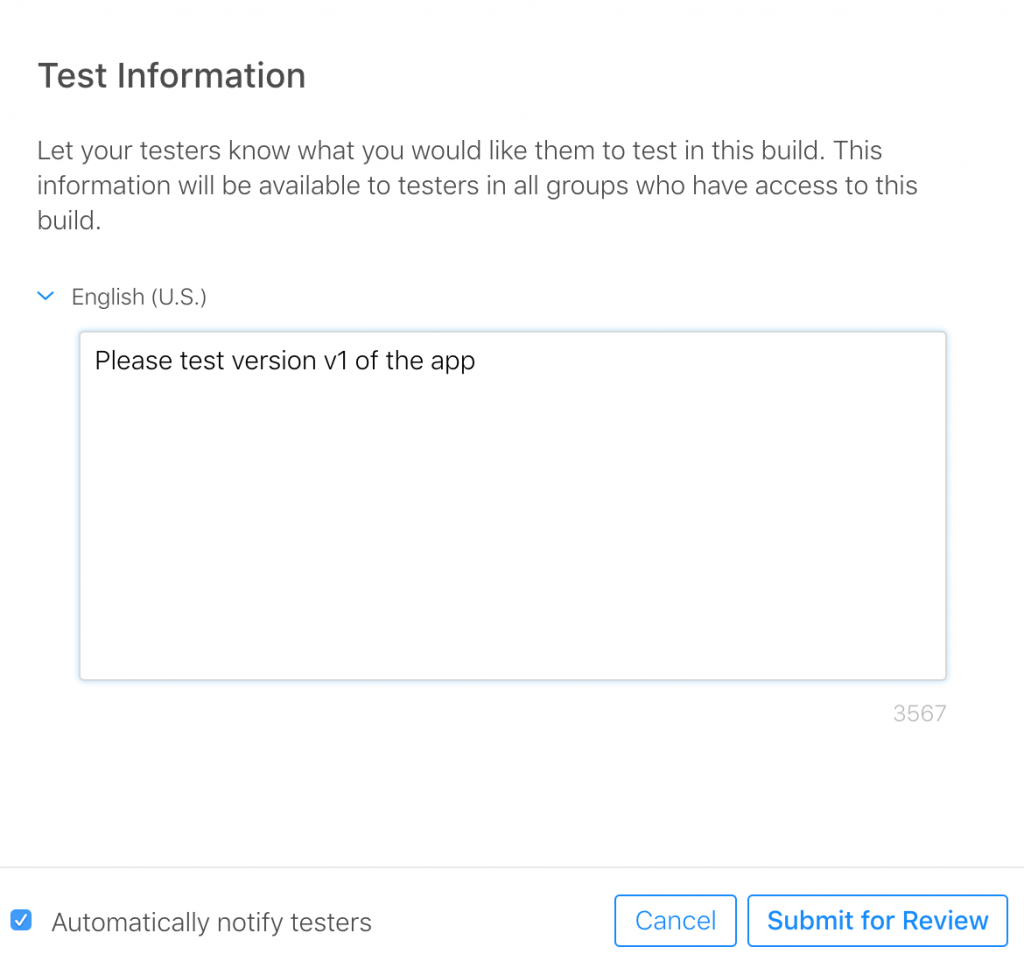
  11. Enter the information about the build, ex what to test and click on Submit for Review
  12. Your testers will receive email to test, they can install the TestFlight app and test out the app

Related Post

AndroApp and GDPR

What is GDPR?

The General Data Protection Regulation (GDPR) (EU) 2016/679 is a regulation in EU law on data protection and privacy for all individuals within the European Union. It also addresses the export of personal data outside the EU. The GDPR aims primarily to give control to citizens and residents over their personal data and to simplify the regulatory environment for international business by unifying the regulation within the EU.

It was adopted on 14 April 2016, and after a two-year transition period, becomes enforceable on 25 May 2018. The GDPR replaces the 1995 Data Protection Directive. Because the GDPR is a regulation, not a directive, it does not require national governments to pass any enabling legislation and is directly binding and applicable.

The GDPR extends the scope of EU data protection law to all foreign companies processing data of EU residents. It provides for a harmonization of the data-protection regulations throughout the EU, thereby making it easier for non-European companies to comply with these regulations; however, this comes at the cost of a strict data-protection compliance regime with severe penalties of up to 4% of worldwide turnover or €20 million, whichever is higher.

What does it mean for AndroApp?

To give our clients better experience, we at Androapp are using google analytics to capture crashes, renewal status and page hits for all the apps (apart from your own analytics). We as such are not collecting any personally identified information, however taking a cautious approach, we will disable this collection permanently.

[update]: We have disabled Google analytics from version 15.00 onwards

What does it mean for you?

For those who submitted your app through us (using android app account). As we don’t have control over your app content

  1. We will un-publish  Android apps OR transfer it to your own google developer account, we have already communicated to relevant owners.
  2. FOR IOS apps, we will remove European union countries from the distribution, OR you can chose to resubmit the app from your own account.

Also

We can not advise you as to whether you are GDPR compliant or not, you should consult your legal representative for the same.

However, we are working to give the best possible support to our partners to be GDPR compliant.

In general, you should check where all you are collecting user’s data, ex. Analytics, Ads (admob, appnext, admob, adsense others), push notifications, login forms, comments etc. and take appropriate action.

Versions used By AndroApp

We are using below versions in our last update 15.00 (in android)


AppNext
'com.appnext.sdk:ads:2.3.0.469'
'com.appnext.sdk:banners:2.3.0.469'
from AppNext team =>

Push Notifications
com.google.firebase:firebase-messaging:15.0.2
Google Analytics and Admob
'com.google.android.gms:play-services-ads:15.0.1'
'com.google.android.gms:play-services-location:15.0.1'
'com.google.android.gms:play-services-analytics:15.0.2'

References

https://en.wikipedia.org/wiki/General_Data_Protection_Regulation

Adsense: https://support.google.com/adsense/answer/7670013?hl=en&ref_topic=7670012

Analytics: https://support.google.com/analytics/answer/6366371?hl=en&authuser=1&ref_topic=2919631

Admob: https://support.google.com/admob/answer/7666519?hl=en-GB&ref_topic=2745287

For any queries or suggestions please feel free to contact us on contact[AT]androapp.mobi.
Related Post

Add Home option in AndroApp Menu

You can follow these simple steps to add home menu option

  1. Login to your wordpress admin dashboard
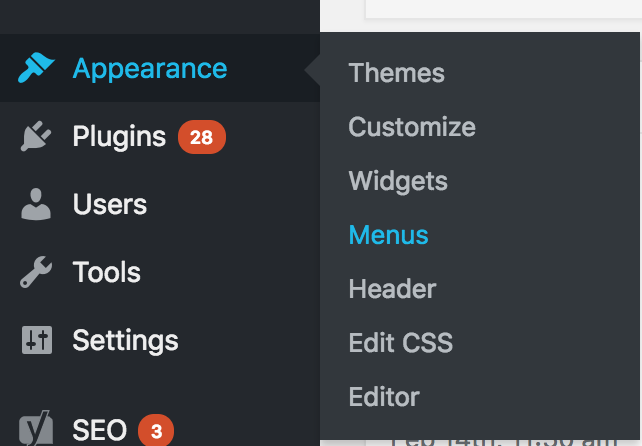
  2. go to Appearance->Menus
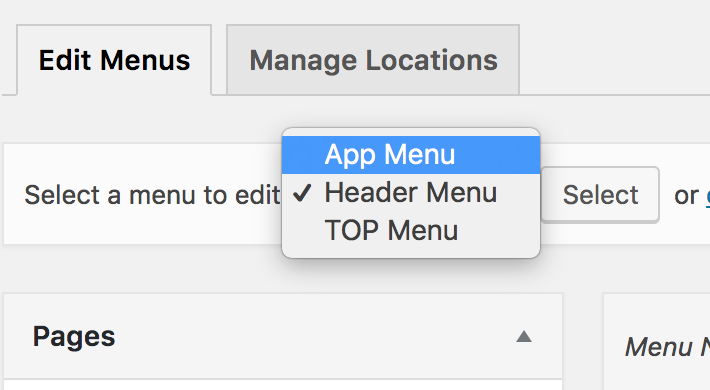
  3. Select your app menu (which you selected in AndroApp->Configure tab
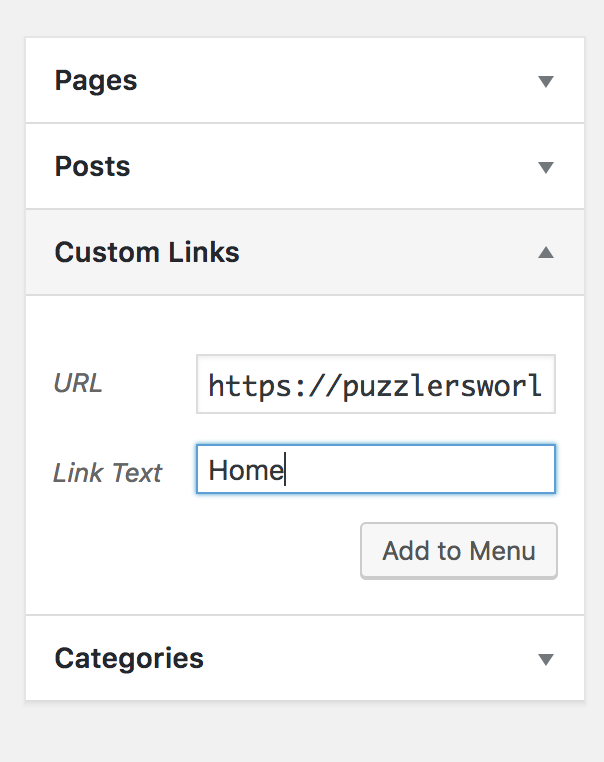
  4. Expand Custom Links
  5. Enter Your website link* in the URL textboax (exactly as it is in AndroApp->Look & Feel section
  6. Enter Home in Link Text textbox
  7. drag the home menu option to top
  8. Save Menu
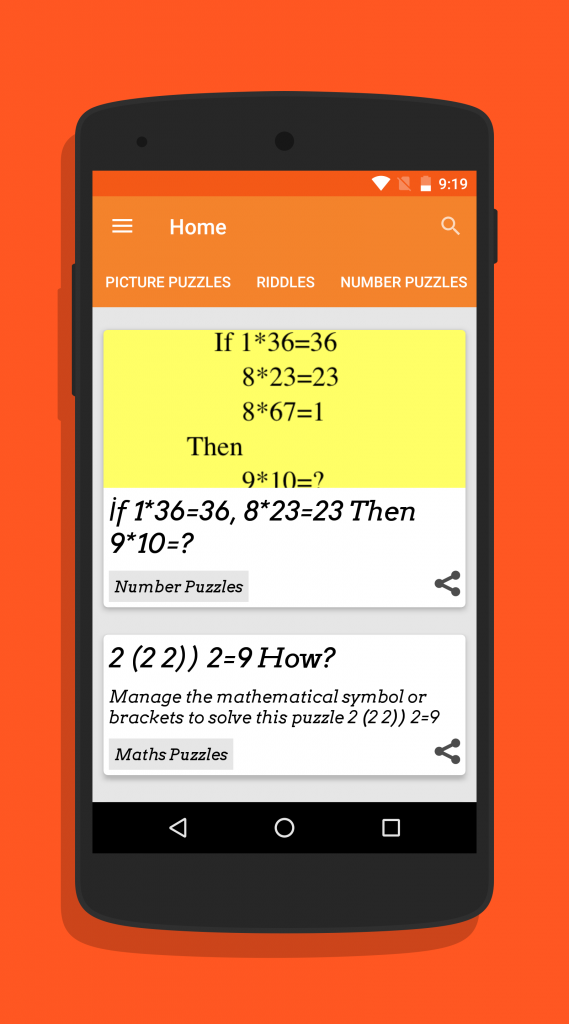
  9. And restart your app, you should see Home menu option in your app menu

Note: * if you are using single post/page for your homepage, you might want to put that single post/page link instead

Related Post

Webview (in app) OR External Browser

By default all of your website’s urls are opened in webview(i.e. in the app).
similarly,  all external urls are opened in external browser by default.

We have added a feature to override this behavior, it is available since app version 11.02 (only in android version as of now).

Regex tricks which can be helpful

  1. Open all external links in app

Enter .* in Regex to open external url in app textbox

  1. Open links from selected hosts in app

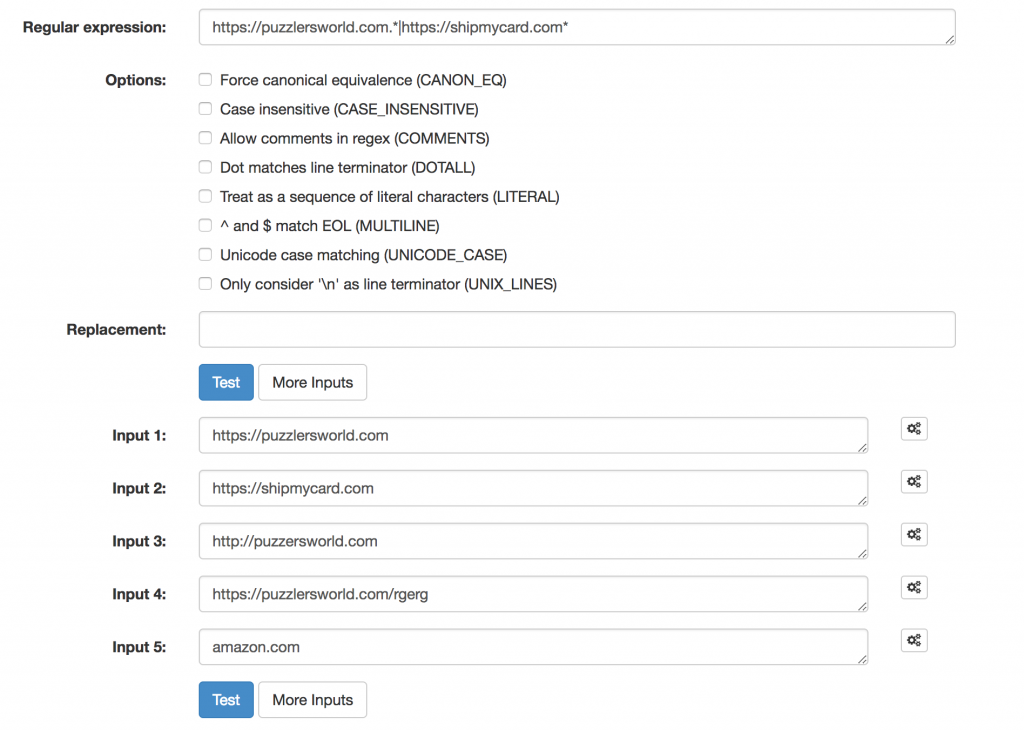
Enter https://puzzlersworld.com.*|https://shipmycard.com* in Regex to open external url in app textbox

above will open all the urls from https://puzzlersworld.com and https://shipmycard.com in app, you can add multiple hosts separated by pipes(|).

If you are wondering on how to test the regex, use this nice website to check if the urls matches the regex you want to use: http://www.regexplanet.com/advanced/java/index.html

for above example, we tested it by entering

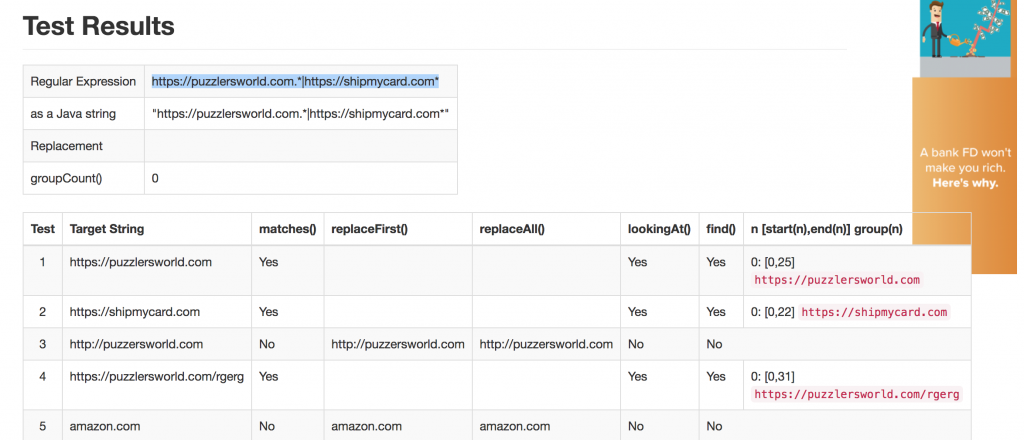
we got this output for above input

you can see that it evaluates to true for 1,2 & 4, that means regexes matches for the url’s in 1,2 & 4 and these url’s will be opened in app.

  1. Open some link from your site in mobile browser

Lets say we have an app created for https://bestsmswishes.com website and we want to open this link https://bestsmswishes.com/there-is-no-better-friend-than-a-sister/ in external browser, instead of in the app itself.

i will enter https://bestsmswishes.com/there-is-no-better-friend-than-a-sister/ in Regex to open your website url in mobile browser textbox

  1. Open all of your websites pdf links in mobile browser

enter .pdf* in Regex to open your website url in mobile browser textbox

This is a great way to handle some of your links differently, we will recommend playing around with the regex tool to handle your cases , once again here is the link for your reference: http://www.regexplanet.com/advanced/java/index.html


Related Post

Top Slider Menu in AndroApp

We recently added a new Menu option in AndroApp in last release version 11.00, Top Slider Menu.

Checkout this screenshot

How to add this menu in your Android App via AndroApp?

  1. Update AndroApp Plugin to latest version 11.00 and above
  2. Go to AndroApp->Configure tab in your wordpress dashboard
  3. Select the slider menu from dropdown (you should create a new menu just for slider menu from Appearance->Menus and select that one here)
  4. Create New apk from AndroApp->Look & Feel
  5. install new apk to your android device and test it out thoroughly
  6. Upload this new apk to Google play store.

Note:- Slider menu is available only on Android versions, it is not available in IOS versions as of now


Related Post

Manage AndroApp Menu Icons

We have done some improvements in Android Menu in our latest release version 10.00.

What it includes?

These are the main features of this change

  1. We now show your app’s icon and name at top of the menu with menu color matching with action bar color.
  2. Added menu icons support

How does it look?

these are some of the screenshots to give you a glimpse

How to Manage Menu Icons?

AndroApp supports FontAwesome icons and by default we try to show the best possible icons ourselves, but obviously you might want to override those icons for some of your links.

to change the icons

  1. install Menu Icons plugin on your wordpress site, this plugin has more than 1 lakh active installs
  2. Go to Appearance->Menu from your wordpress admin dashboard
  3. Select FontAwesome under menu icon settings
  4. Select the Android App menu which you have selected in AndroApp->Configure tab
  5. Expand the menu for which you want to update the icon
  6. Click on icon: Select link
  7. Select the icon from the popup
  8. And click on Save Menu button at bottom

Note:

  • If you are using the same menu on your website, than you might want to change the menu icon settings to show/hide icons on your website
  • It might be possible that some of the icons are not supported in app, in that case, use a different icon
  • If you have a version older than 10.00 on google play store, than you need to publish a new apk  – so create a new build, test it and publish it to play store.


Related Post

Added Slideshow option

In the last release we have introduced a new post content type, i.e. Slideshow

What is this option about?

Androapp provides you the ability to load post detail page content in different ways, like pre processed, post processed, load as url already, with this new option, when a user clicks on feed image, post’s images will directly open as a slide show, like below

How to turn on this feature?

  1. login to your wordpress admin dashboard
  2. go to Androapp->Configure tab
  3. Scroll down to Post Content Type section and select slide show
  4. Select Failover post content type – if there are some images in the post than it will open the slideshow, post content will not be visible, if there are no images, than it will fail back to Failover post content type

Note:

This feature is available from App version 9.00 onwards – so if you are on the older version, you need to publish a new apk to google play store, also you should give enough time for new version to distribute among your existing users before you enable slideshow.

Related Post

Google Play Upload Failed due to Signing Issue

Deprecated

Note: This article is deprecated, with .aab support we allow Google to manage your signing keys, please see this post for more details.

Google has recently added a functionality to manage App Signing, where google gives you certificates to manage signing certificates for your app.

But We are androapp currently does not support individual signing certificates, so you might come across the below error while trying to upload the apk generated by us.

Upload failed

You uploaded an APK that is signed with a key that is also used to sign APKs that are delivered to users. Because you are enrolled in App Signing, you should sign your APK with a new key before you upload it.

How to fix?

Currently google does not provide any option to disable App Signing after you enable it, so you should create a new App entry with App Signing disabled.

When you will try to upload new production apk, you will be asked to Enroll for App Signing, please select Not Now

Related Post